Showing posts with label DIY. Show all posts

Tuesday, October 15, 2013

DIY Abstract Art: West Elm Hack

A few weeks back we got around to adding a few decorative touches to the new house.  At first I wanted a mirror to go above the buffet, but later decided that some art would pack a bigger punch.  Purchasing a nice piece of art was definitely not in the budget so DIY'ing we went.
 I first saw this abstract art in West Elm's catalog, it wasn't really my style but I every time I saw it, I liked it more and more.  Black and white is easy to decorate it...goes with most anything.  Then I began to see some replicas floating around blog world.  I found more inspiration here, here, here, and here.
I could have just purchased a large canvas from Michaels, but we went the extra cheap route by making our own frame using wood we already had and a drop cloth.  After Billy assembled the frame, I started painting.  Thanks to his suggestion we painted the drop cloth white first.  Made for a better background and the surface became easier to paint with the white as the base.  The white paint was actual wall paint, but the rest was all acrylic paint.
I felt it needed a pop of color and chose to add a little bit of gold and hints of fuchsia.
I love the black and white of the original, but mine needed a little kick.


To finish the sides I took inspiration from Emily A. Clark and painted them gold.


I'm hardly an artist so this was the perfect skill level for me.  Surprisingly, we've had a few visitors even ask where we purchased it from:)

Sharing with:

Home Stories A to Z

My Uncommon Slice of Suburbia

XOXO

Aubrey

Monday, December 3, 2012

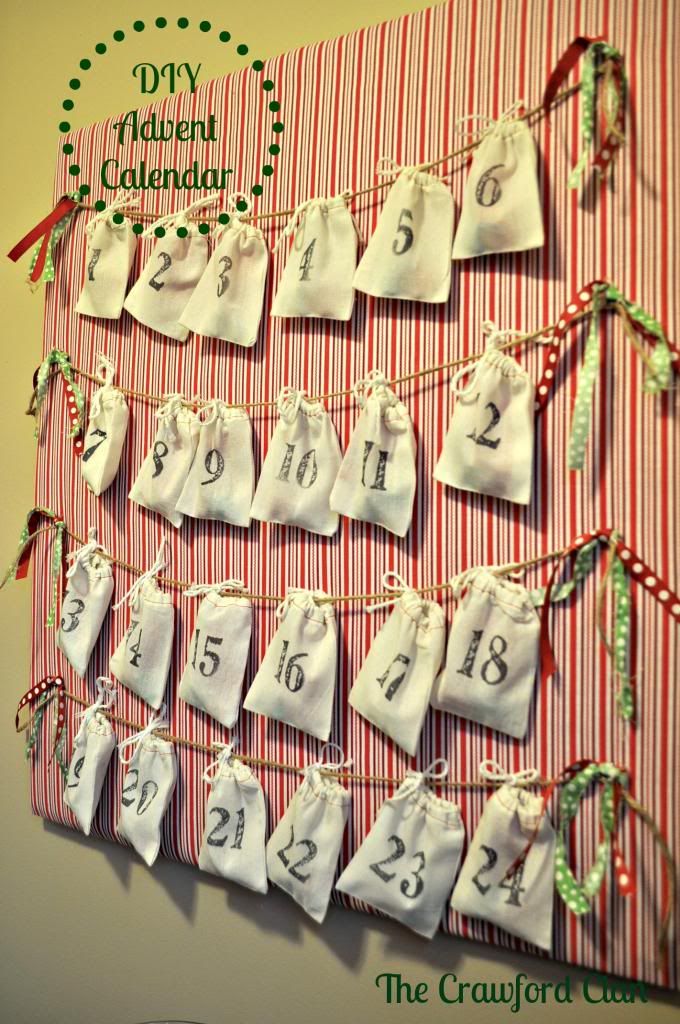
Let The Countdown Begin {DIY Advent Calendar}

Besides preparing for and celebrating Lauren's fourth birthday, we have been busy getting the house decorated for Christmas.  I've added a few new projects to share and up first is my DIY advent calendar.  

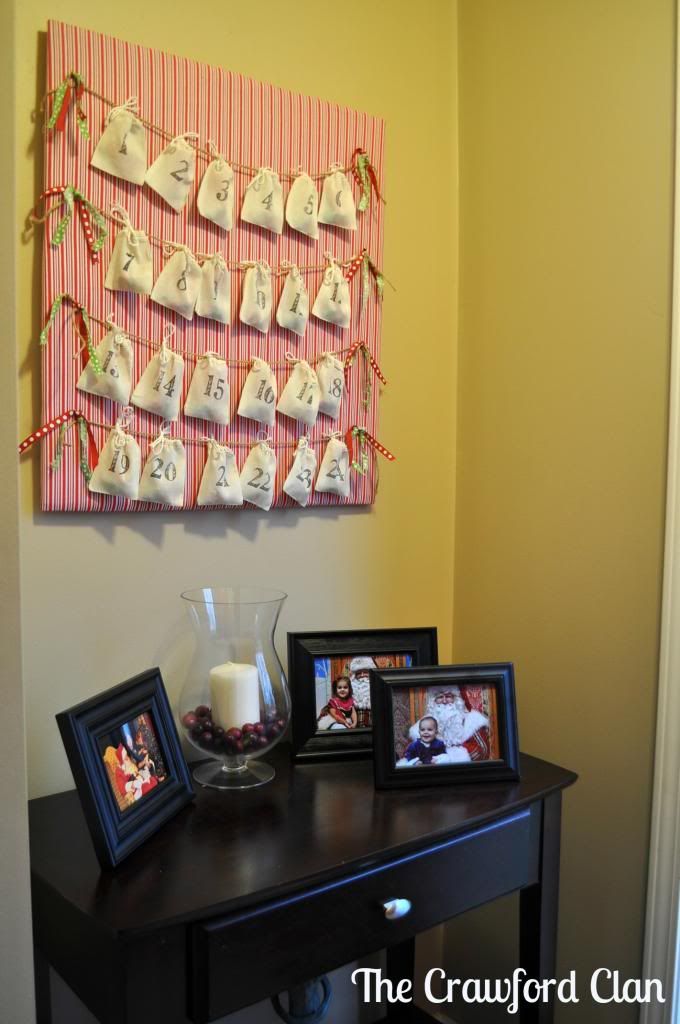
I wanted to make something this year that we could hang in our foyer and use for years to come.  It's great that it's hanging and out reach because you know who would do just about anything for some chocolate!

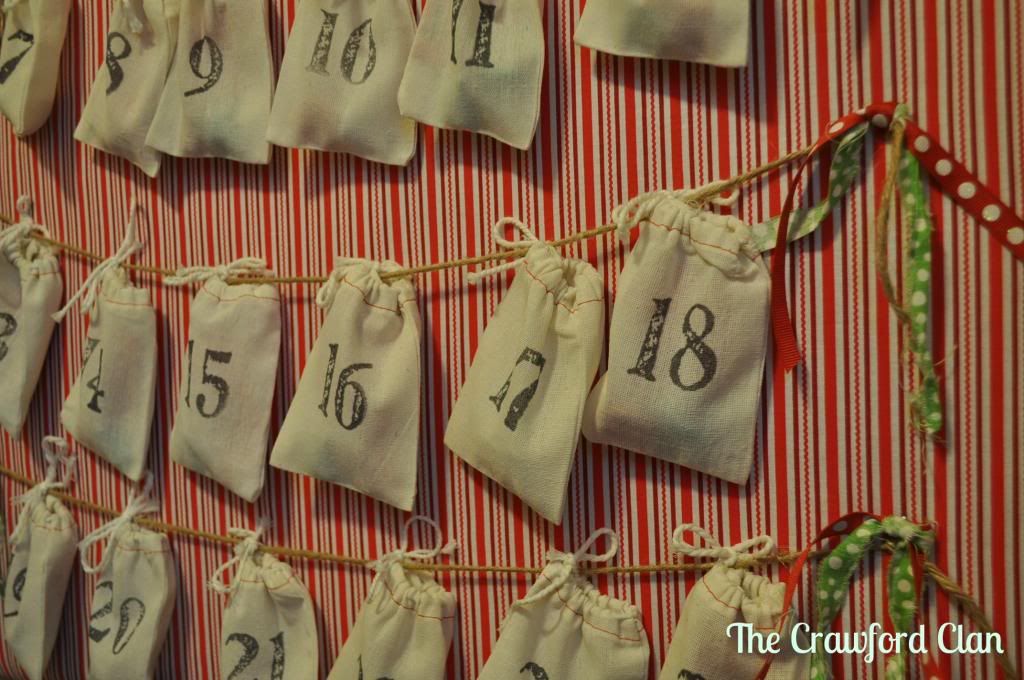
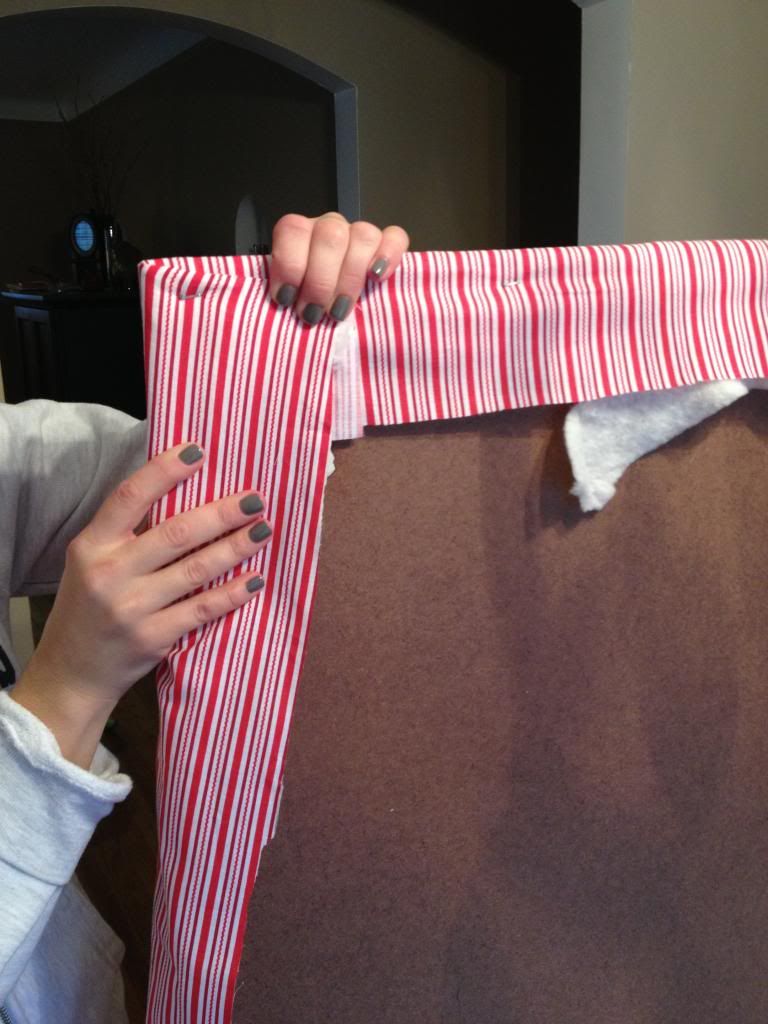
There really isn't a crazy tutorial here.  I had Billy cut a board to the size I wanted and then stapled fabric and batting.  Once complete, we again used the staple gun to hold the kitchen twine in place on either end and I added decorative ribbon and torn fabric.  I tied each bag lightly for easy access.  And no DIY on the adorable bags, that was all etsy.  
Like last year, I've written an activity we can do each day and of course two hershey kisses.  Also on display are each year's visit to Santa.  We actually took Lauren and William to visit the big guy today and the picture is CLASSIC!  Can't wait to share!

Any new Christmas decorations in your house?
(Pardon the horrible yellow pictures, an overcast day didn't provide good light)

Sharing With:


XOXO

Aubrey

Tuesday, November 27, 2012

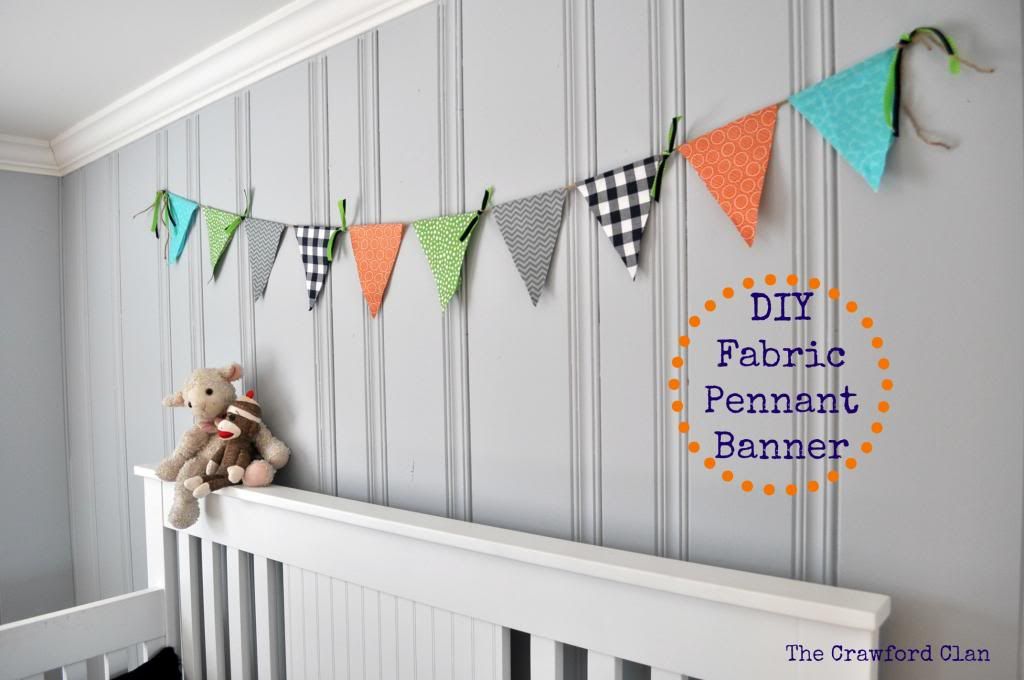
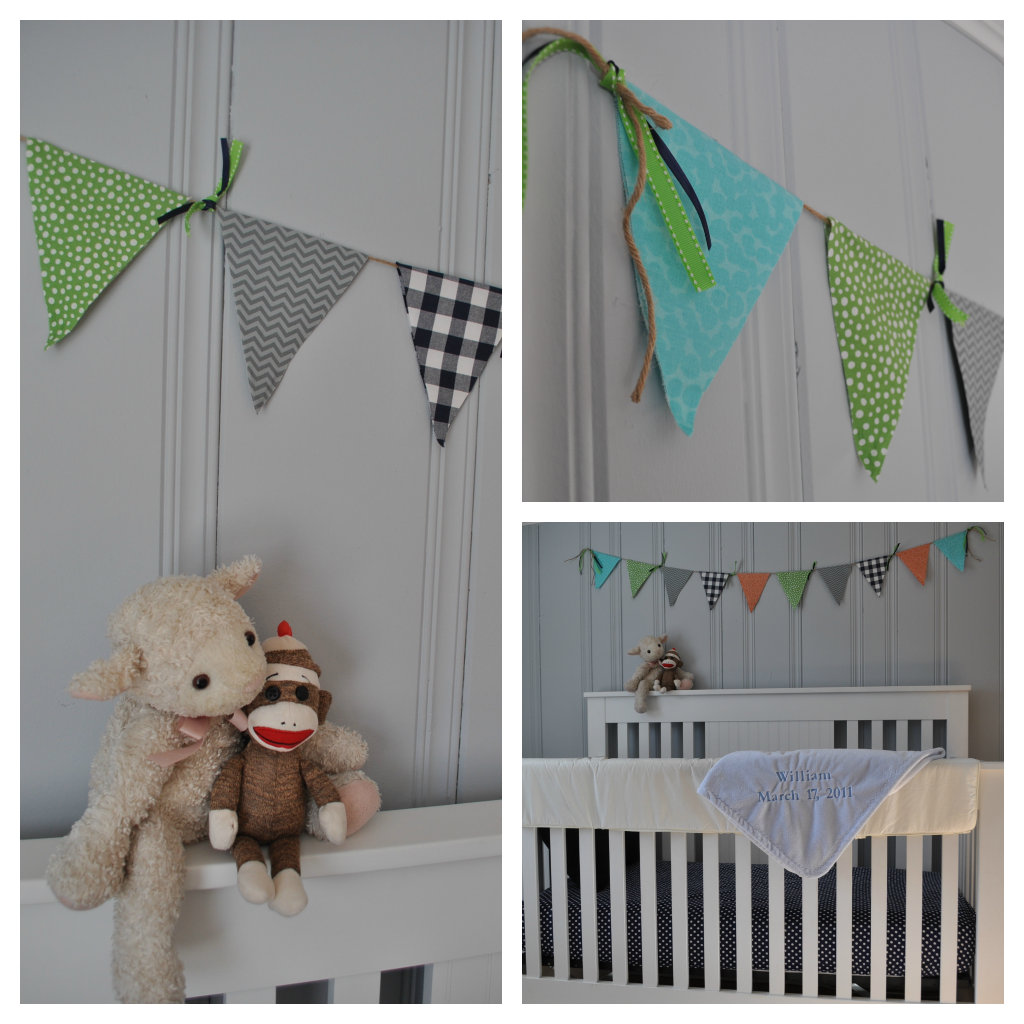
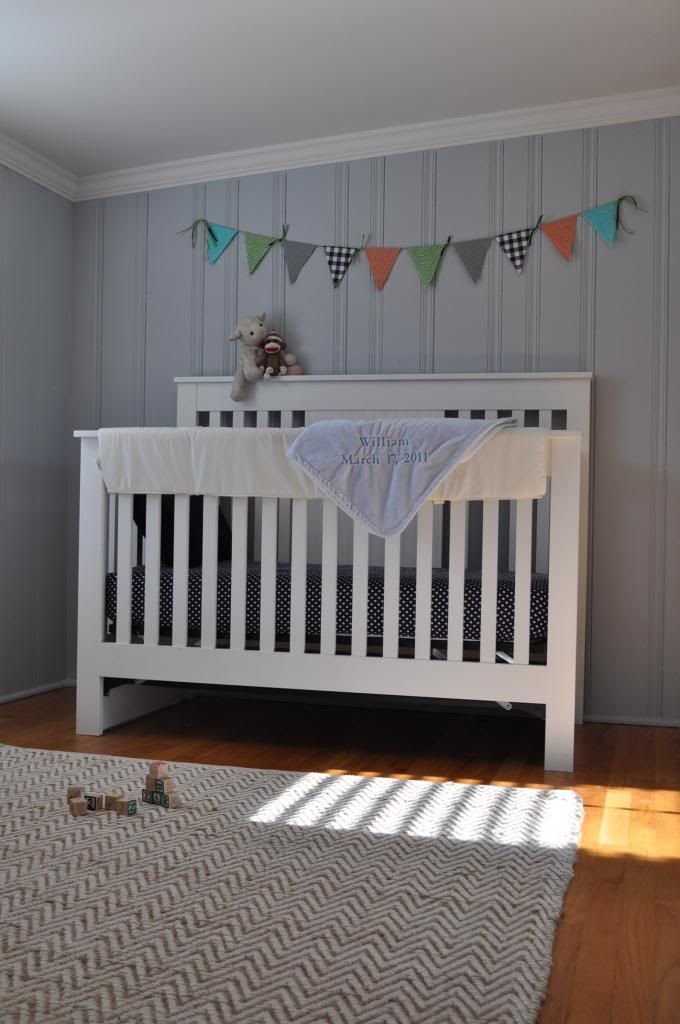
William's Room: {DIY} Fabric Pennant Banner

This little boy's room is officially done, though I think I said that last week.  Totally forgetting that I had one last project up my sleeve to show you.  

Being the bad blogger that I am, I didn't take any step by step pictures, but it's simple.

Supplies Needed:
*Fabric
*cardboard to make a template
*kitchen twine
*hot glue
*fabric glue
*ribbon

Steps:
1.  After purchasing all your fabric, you'll want to make a diamond shape template out of cardboard.  The sizing is up to you based on how big you want it.  I used a pen to trace onto the inside of the fabric to make it easier to cut.
2.  After cutting out all of your diamonds, you will want to use an iron to fold the fabric into the triangles.  
3.  I laid out the kitchen twine (don't cut the twine until you have hot glued every triangle) and one by one I hot glued the inside of the crease of each diamond.  
4.  Once complete, I did use fabric glue on the point of each triangle just to seal the two tips together.  I'm sure some would sew the edges to prevent fraying, but that isn't part of my skill set.
5.  Lastly, we hung.  Instead of nailing it into the wall, we used a staple gun.  To hide the staples and add more pop to the banner I tied coordinating ribbon.
This project took me three months to complete.  The actual time spent on the project was probably three hours.  Not including picking out the fabric.

I also wanted to share that my post last week about William's gallery wall was featured today over at My Uncommon Slice of Suburbia.  
My Uncommon Slice of Suburbia


I'm crazy excited that there were over 200 entries and my little blog was one of the featured posts!  There are some great projects also being featured, be sure to check it out.  

Also sharing with:


XOXO

Aubrey

Tuesday, October 9, 2012

$3 Fall Mantel

I'm really excited about how the mantel turned out, because it only cost me $3!  I had purchased some fall decor last year with the idea in mind that it would last awhile, but totally changed my tune when I unpacked it and looked at the blog post from last year. I just felt I could get a little more creative, a little simpler, while bringing some natural elements in.  BUT, if I'm going to be changing things up year after year I needed to do this with little to no cost.

My inspiration started with the acorn frame I found here.  I got the frame in the dollar bin a Michaels and made a game out of finding all the acorns with the kids.  I simply hot glued all the acorns and added the burlap and leaf.  


I wanted some branches to bring more outside in and add some height.  I found them on a walk but after arranging them in the mason jar, thought they needed a pop of color.

I just made my own pumpkin branches by breaking apart this little guy from last year.

This side was A LOT harder to figure out on a budget.  Keeping it simple, I got the ghords for $2, found the candles and candlesticks in the closet and finished it off with a little kitchen twine.  


I keep thinking I can make this side better, but  I decided to stop obsessing over a MANTEL and move on:)


Sharing With:

The Insprired Room

XOXO

Aubrey


Tuesday, September 18, 2012

If You Give A Mouse A Cookie...(DIY nightstand)

I posted about the lamp I found for Lauren's room a few weeks back and it got me thinking about what I could do to her nightstand.  There is a matching nightstand that I was going to paint white and use in William's room, but decided the unused one needed to be as bold as the lamp.


What do you think?  Bold enough?
I think it's perfect for my packed full of personality preschooler:)


 Here was the before.  I actually bought the set for $25 off Craigslist 5 years ago and painted them black.  I'm thrilled they are being repurposed again. 


 Unfortunately, I'm not as skilled as Billy is with a can of spray paint.
He lightly sanded everything and was good to go.
We've had good luck with this brand and the best luck when the humidity is low.  Sticky air means bubbles.

Ladies and gentlemen, please don't be fooled by Billy's charm and good looks.  He isn't always so willing to help when my wheels start spinning.  Projects usually involve beers, and not because they are difficult but because he has you-know-who critiquing and questioning him at every step.  And a post-project nap?  Let's be honest, spray painting doesn't take a lot out of you...but I go along with it because I'll need his expertise again soon.


My favorite part are the glass knobs that I had picked up at Home Goods months ago.  They complete the nightstand and dress it up.


Mrs. Mouse got her cookie and glass of milk and Mr. Mouse is praying she stays on task on completes one project at a time!


Sharing with:

Home Stories A 2 Z


XOXO

Aubrey

Wednesday, September 5, 2012

William's Room: DIY Quote on Canvas

I found this idea on pinterest a few weeks ago and thought we could do something similar in William's room.  Find a quote, glue, paint and voila!

This blogger used old magazines, newspaper, or pages from books.  I wanted something that would have a little more meaning.  The Dr. Suess book Oh, The Places You'll Go! , has been a family favorite!

This book was given to me by a dear friend when I graduated from high school.  I've kept it ever since and read it to both Lauren and William while pregnant and ever since. 
Billy and I picked a few favorite pages and had color copies made.

The supplies needed are a canvas size of your choice, acrylic paint, brush, glue, vinyl letters, and mod podge for a finished look.


As much as I love the title, this quote is one of my favorites.  I laid the paper out and used hot glue (though elmers would have worked too).  Then I placed the vinyl letters in place and painted away, painting over the letters too.


After the paint dried, I removed the letters.  They pulled away easily and then applied two coats of mod podge, though I think I might add one more to give it more shine.


Like most of my projects, it was pretty painless.  
For less than $20 we've got an original piece of art.


Sharing With:


XOXO

Aubrey


Thursday, August 9, 2012

Bachelorette Bash

I wanted to share some of the details from a bachelorette party I helped host over the weekend.  I was surrounded by some very creative ladies so I can't take all the credit.  The planning process was a ton of fun, but loved watching it come together even more!

The bride to be is lover of white wine, so we decided to do a blind white wine tasting during happy hour to see how well everyone knew their wine!

All the decorative signs were courtesy of Jocelyn, loved them!

We thought it would be fun if everyone could take home the glass they used for the tasting.  It was my job to personalize.  

Aren't these darling?  I just used oil-based paint pens to make polka dots and letters, which happens to be about as artistic as I get.  Easy, peasy and bachelorette style cookies topped the whole look off!

(They were all hand washed at the end of the night and seemed to hold up.  
The jury is still out and long term use.) 


Our dinner was simple...make your own pizzas and a homemade caesar salad.  Unfortunately, this is the only picture I got:(  We came up with five kinds and had the fixin's ready, though you could create your own too.


To all the bridesmaids...you were a blast to work with, can't wait for the big day!!


Signature cocktail...strawberry lemonade cocktail, courtesy of Meghan P.

The countdown is on!  See you all again soon!


XOXO

Aubrey


Tuesday, July 10, 2012

William's Room: DIY Fabric Letter

I tackled my latest project last night and early this morning.  I would have more pictures for a tutorial, but I was multi-tasking.  Last night while watching TrueBlood and this morning while making the kiddos breakfast.  
How about a little hot glue on your french toast?

I found inspiration from these letters and followed the simple tutorial.  


Supplies were simple.  Fabric, scissors, fabric glue, padding, sharpie, hot glue gun.
Oh, and the letter, pictured below.

A little hint...just cut bigger and gradually go smaller.  You can always cut more, even after gluing.  I also glued one side of the letter and then the next, pulling tightly.  The tutorial suggested gluing the face and then the sides.


I'm not a crafting genius and besides a few glue burns, it was easy.  Maybe an "R" or "B" would be harder.  When doing the sides, I simply eyeballed and cut a long stripe that was a little bigger than double the width of the letter.  I used the fabric glue to fold over the fabric so there wasn't a frayed edge on one side.

I just hot glued the other side to the back of the letter.  I did make cut outs (if that makes sense) to help make sure the sides were tight.


 I do have rest of his monogram and enough fabric to complete the project.  But I'm going to wait until we get the room more complete in case I want to throw in a few other patterns.  

I think it matches pretty well:)


 I am linking up this post as part of a summer pinterest challenge project with some pretty talented home bloggers.  Check out Young, House, Love, Censational Girl, and Ten June.  


Warning:  you can get pretty lost in clicking on some of these projects:)


XOXO


Aubrey