Showing posts with label home decor. Show all posts

Tuesday, October 9, 2012

$3 Fall Mantel

I'm really excited about how the mantel turned out, because it only cost me $3!  I had purchased some fall decor last year with the idea in mind that it would last awhile, but totally changed my tune when I unpacked it and looked at the blog post from last year. I just felt I could get a little more creative, a little simpler, while bringing some natural elements in.  BUT, if I'm going to be changing things up year after year I needed to do this with little to no cost.

My inspiration started with the acorn frame I found here.  I got the frame in the dollar bin a Michaels and made a game out of finding all the acorns with the kids.  I simply hot glued all the acorns and added the burlap and leaf.  


I wanted some branches to bring more outside in and add some height.  I found them on a walk but after arranging them in the mason jar, thought they needed a pop of color.

I just made my own pumpkin branches by breaking apart this little guy from last year.

This side was A LOT harder to figure out on a budget.  Keeping it simple, I got the ghords for $2, found the candles and candlesticks in the closet and finished it off with a little kitchen twine.  


I keep thinking I can make this side better, but  I decided to stop obsessing over a MANTEL and move on:)


Sharing With:

The Insprired Room

XOXO

Aubrey


Friday, August 31, 2012

Friday Find

The kids and I were running errands this morning, something I dread and try to avoid as much as possible.  But when I have to do it, I'm all business.  Stick to a list, bring snacks, avoid any unnecessary aisles, and for the love of God....stay away from toys and breakables.  Simple, right?  Wrong.  I'm so easily distracted, even in my least favorite place, Home Depot!  Who knew there were so many choices for garbage cans.  Moving on.  Sometimes I just can't pull myself away, be it shoes (for Lauren) or that dreaded dollar bin at Target.

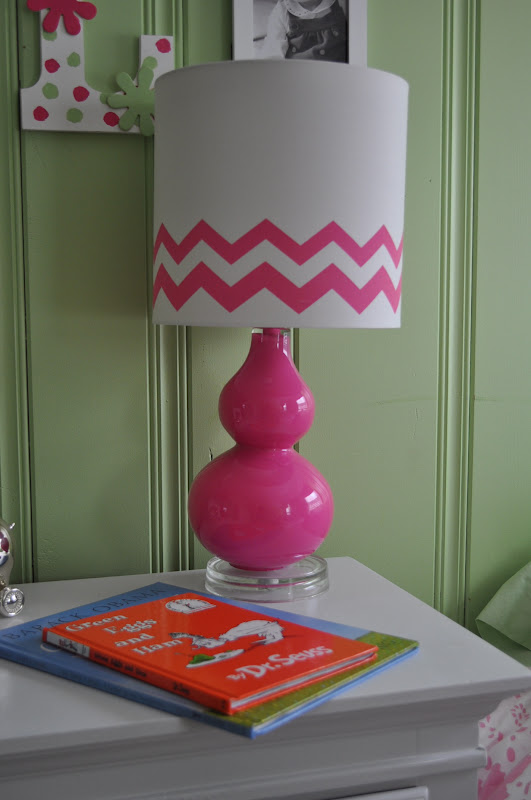
Much to my surprise my children were acting like little angels and I was able to browse all things cute at Home Goods.  Talk about breakables?  I actually was there for the purpose of finding a new lamp for the living room that "not me" broke.  

I wasn't there looking for a lamp for Lauren, but as soon as I saw this one, I knew it was coming home with us!  Cute, right?  And only $30!  
Let's hope "not me" keeps this one in tact:)


XOXO

Aubrey

Tuesday, May 1, 2012

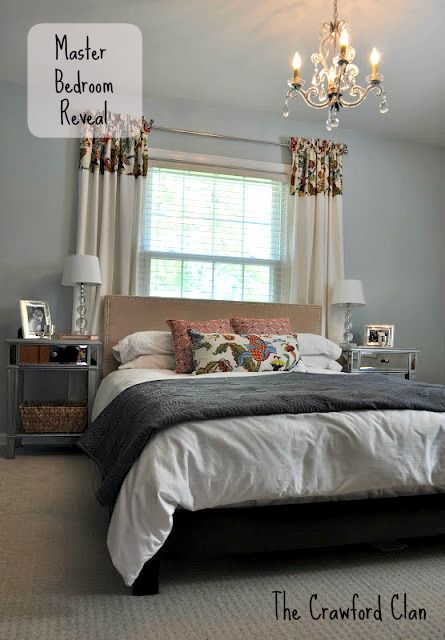
Master Bedroom Reveal

It's done!  I crossed off the last few items and even though there are one or two lingering ideas in my head, I had to stop because it's May 1st and we haven't even started on William's room.  


Inspiration Room
Before we even started this project I searched and searched for an inspiration room.  I wanted something to get me going.  Once I got my sea legs I moved further and further away from this room, but there are still some similarities.
*Wall color - Sherwin Williams Rainwashed
*Nailhead Headboard
*Decorative bed pillows


This is the view from the hallway and probably the best picture to show the paint color.  I just can't seem to capture the real color in my photographs. But you can compare this picture to the inspiration room.


The chandelier was a must have for the room and we picked it up at Lowe's for under $150.  I love the bit of glam it brings to the space.  


I originally thought plain white curtains were what I wanted, but they were just to boring.  During one of my late night blog reading sessions, I found these!  She had the same Ikea curtains that I had purchased.  I showed the link to my mom and using our leftover fabric, created these!  Slightly different and love the finished look my mom created.


 The spot under the gallery wall became a major obsession.  It's very tight between the wall and the nightstand and every time we tried a dresser, it just seemed too compact.


We had these leather ottomans in the play room that were really just taking up space, so I moved them and feel they work as a bench and storage for seasonal items.  AND to take it one step further I had to put some color there.  I moved a pillow from the bed and found the other two at Pier 1. 

I did follow through with the dresser additions to put my everyday jewelry at the end of the day.

 I got the little red bowl from Anthropologie and found the silver tray at Target in the dinnerware section.  I emptied the tray for a pretty picture, but it usually has bobby pins, something William was trying to eat and random lists and receipts.


The nightstands were a splurge from Pier 1.  A splurge to us but a savings when you compare the cost to some of the other stores.  A two or three drawer nightstand would have given us more hidden storage, but I added a basket underneath to hold some magazines and feel it works.

I'm really in love with it!  The area below is what I almost didn't show you, but now you'll know why I have lingering ideas.  The plant stand needs to go and has already been taken down by William, and the dresser across from the bed is just a placeholder.  But for now it works.  


We do need to find some sort of laundry hamper and because my shoes will remain upstairs some of the everyday favs need a home.  And where do you hang your purse?  There never has been a good spot for it.  Ideas?


Here are my other posts about the bed and  DIY nailhead headboard.  Enjoy!

Thank you for letting me share this with you.  I really do love decorating our home and have enjoyed documenting it here.  I wish I knew what my nursery looked like or how my parents first decorated their home.  The digital world sure has helped with that.  Whether they want to or not, my kids will get to see it.  And I too can see how my taste evolves over the years:)

Sharing with:

XOXO

Aubrey


Monday, April 23, 2012

Spring Blooms

May is right around the corner and this is usually the time I get the idea for a spring pot on our front porch.  Until this year, I've never done one because I ultimately decide that I'll be planting for summer soon enough and why bother?

I got my idea much earlier and had my pansies in hand before April 1st.  I can't believe how well they've done even on cold nights.  I only bought a few because our pot isn't that large and then purchased some forsythia branches from JoAnn's and later got some real branches from Kroger for $.99 because I felt it wasn't full enough.


And of course, I needed a wreath.  I love the look of burplap and found this easy tutorial.  I didn't want an Easter theme, just something springy that could also be used into summer if I wanted.  The flower just clips on so I could easily change out.  Simple, no fuss.


Any Spring projects you're working on?  Or are you holding off till summer?


XOXO


Aubrey


Thursday, April 5, 2012

Master Bedroom: Bed Reveal

Our bedroom is almost complete.  This project has taken much longer than I ever thought it would, kitchens are done faster.  Life happens, right?  But I'm so happy with how it's turning out!  Warm and inviting....I never want to leave our little haven.  


I showed you how we made the headboard but we did end up purchasing the actual bed frame from West Elm.  I wanted the backdrop of the bedding to be white and added colors and patterns with pillows and a quilt.


I found the corally red pillows at Target and my mother made the floral pillow.  I just love the fabric (remember, I stalked it)!  It's a classic floral pattern that will never go out of style.  Plus, it has so many colors you could easily change up accents seasonally or pair it with the latest trend.


I was going to add in chocolate brown, but when I saw this grey quilt I knew it would work better with the tones of the room. 


Curtains are hopefully going up this weekend and the current lamps may find a new home, but after that the room should be complete except for a few little things.  That's what haunts me, because I obsess too much that it never gets done:)  


Thursday, March 22, 2012

Master Bedroom: Gallery Wall

After I discovered Pinterest one of my first searches was to find inspiration for a gallery wall.  I've always wanted one in our house and when I knew we were switching some rooms around, the master bedroom seemed like the perfect place.


My inspiration was found here.  There were a few other gallery walls I liked but this was the best.  I wanted our most recent family photo to be the center of the gallery wall, and played around with different display styles before  finally deciding.  The key for me was placing everything on the floor, taking a picture of it, and repeating it with different options.  Then I chose the one I wanted.  Spaced it how I wanted and Billy did the rest.


I also chose all matching frames.  I like these frames from Crate and Barrel because they can be displayed horizontal or vertical.  We can change things around without having to add more holes in the walls...except for the rectangle frame:)

I love all the pictures we chose.  Almost all of them tell a story to us...that picture of Lauren looking out the window is something she loved to do right around 12 months, and now William is doing it.  And the landscape picture was taken when Billy and traveled to Colorado for a long weekend.  We hiked that day and just happened to catch a group of Elk.  It was a special trip and the picture reminds me of it.
I'm sure the pictures will change as we create more memories and I hope we can add a few more frames too...right, honey?


Another blog I follow, A Thoughtful Place, recently posted a gorgeous gallery wall.  Enjoy!

Sharing with:


My Uncommon Slice of Suburbia


XOXO

Aubrey


Wednesday, March 7, 2012

Master Bedroom: Dresser Reveal

Another master bedroom reveal!  
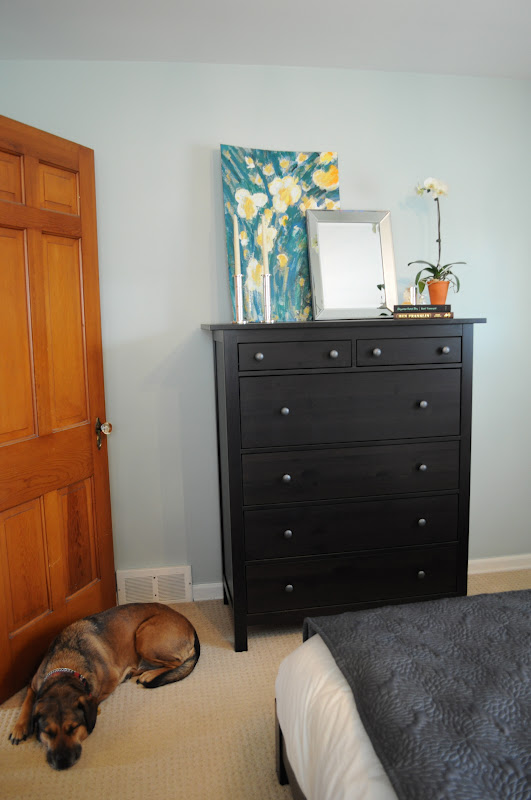
We had been using craigslist finds and hand me down furniture for way too long, so when we decided to move the bedrooms around, we I decided it was time to get a few new things.   But being on a budget, we decided on this IKEA Hemnes dresser for $249.
35 steps later...yes, 35...we were in business!  
(Did you know we have a dog?  Do I know I have a dog?  That's Sydney...or Psycho Syd for short)


We are really happy with it.  It seems to be made really well and the size is perfect for that wall.

I even love the cute yellow striped lined drawers.  Too cute!
And yes, I color coordinate my drawers.  That's the OCD in me:)


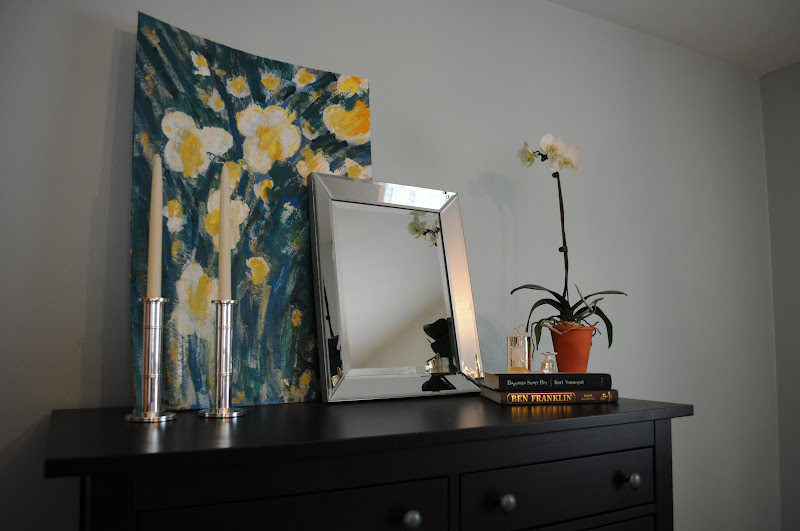
 I purchased a few new things to decorate the top and still want to do a little more, but this will work for now.  I like to let things simmer for a bit before going all out on my decor.  The painting was done by my SIL, Cara, years ago.  We never had a place for it, but after painting this room I knew it would totally work in here.

It's a little damaged from years in our basement, but I thought that leaning it against the wall, layered with a mirror would work.  

I just want to look for a tray or a long box to put my everyday jewelry in at the end of the night.  What do you think?  Any suggestions?  I'd love to hear if you think this works!


 I purchased the mirror for $40 at Home Goods and the orchid for $8.99.  Using books to add height and balance is an easy go to decorating tip!  
Everything else was taken from around the house.


I can even hang my outfit up...because half my clothes won't have a home in this room's closet, they will remain upstairs.  It's really just my dressier stuff, so I'm ok with it.  Someday, all my stuff will be in one big closet!  A girl can dream!


(Dress is from JCP....$27!)


XOXO


Aubrey
Monday, February 27, 2012

Master Bedroom: DIY nailhead upholstered headboard tutorial

I was ready to buy this West Elm headboard, but at an out the door cost of almost $550, I was having a hard time clicking it into my shopping cart.


I had had a conversation earlier that week with a friend telling me I could totally make it myself.  Not being the best DIY'er, but being a savvy internet searcher, I found tons of tutorials.  Only thing left was to see if Billy could do be that handy.   Score!


This tutorial was our biggest help because many out there were actually made and hung to the wall, where we wanted to assemble it to the bed.  Their headboard was a little more involved then ours.  No curves for the Crawford's.  

Supply list and cost:
5 - 1 X 4's
1 - 1/2 birch veneer cut to size from a 4 X 8 board
-------------------- total for the above - $50
1 - Nailhead trim kit from JoAnn's - $10 (50% off coupon)
2 - 3 yards of material - $18 (found in clearance section)
1 - queen size quilt batting - $12 on sale
ruler - owned
rubber mallet - owned
staple gun and staples - owned

Other tutorials we referenced:


 We had the headboard cut at Home Depot to the length and height we wanted based on our specific bed.  The West Elm headboard measured 62.75"W X 42"H.  We did our board as wide, but the height was 5ish inches shorter because we were adding the legs for support and attaching.

We didn't buy the foam that was suggested on some tutorials, because on other tutorials it was explained that the nailhead trim wouldn't go all the way through to the wood.  We folded it twice and stapled away.  Going slow to make sure there were no creases or bubbles in the batting and we followed the tutorial exactly for doing the fabric as well.

The nailhead trim kit was so easy and very forgiving.  A few times we felt our line was straight enough.  You can pull it out and start again.  Just use a ruler as a guide for spacing.

The rubber mallet it key as to not scratch the nailhead.

The finished product!
A savings of $450!  Totally worth it!

Our master bedroom makeover project is coming along.  I can't wait to share more, and hopefully soon reveal the entire room.  


XOXO


Aubrey

Friday, December 9, 2011

It's Christmas Time


As one would guess I'm very particular about what goes on my tree.  Billy said that sooner or later my designer tree will be no longer so we can make way for all the kids ornaments.  My response...we'll have two trees!  Ha!  
I'm so happy with how the tree turned out this year.  I've kept the same color scheme of red and gold for a few years and have gradually added more and more finishing touches.


I picked up these poinsettia's that have really completed the look.  If only I could find the right angel, I could sleep at night:)

Here she is all lit up at night!

Our mantel is the only other area we decorate.  I have some ideas for our buffet, but I'm going to wait to purchase those items until after Christmas.

I've had the same mantel decor since I had my first place.  We just cut a few branches from the back of the tree and voila!

My favorite part is the red string beading.  My mom and I bought it at a speciality shop and I love the way it sparkles and hangs off the mantel. 


Outside I recycled my fall wreath with some Christmas garland, ribbon, and berries.  It was so easy to pull out and replace.  


I'm linking up with a few blogs that I follow.  


 Honey We're Home  

Check out her beautiful home and Christmas decor along with all the other trees.

And here
christmas tree party


XOXO

Aubrey